Applying DTF Transfers with a Cricut A BulkApparel Guide
Learn how to apply Direct-to-Film (DTF) Transfers using a Cricut EasyPress. This quick guide covers the ideal temperature, pressure, and peeling technique to achieve professional, long-lasting results on compatible blank garments from BulkApparel.
Step-By-Step Pressing Instructions
Follow these steps to ensure perfect application every time.
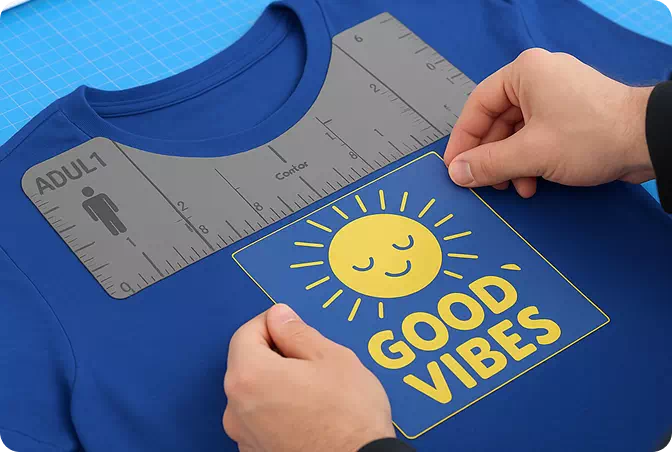
1. Position Your Design
No need to pre-iron your DTF Transfer will stick just fine. Position it about 3-4 inches from the collar on adult shirts, 2-3 inches on youth, and 1 inch lower for the back.
For best results, press a sample shirt and try it on to gauge placement. Once you're confident, aligning future transfers becomes easier.
Want perfect consistency? Use a Pressing Alignment Set great for adult, youth, toddler, infant, and sizes up to 6X.
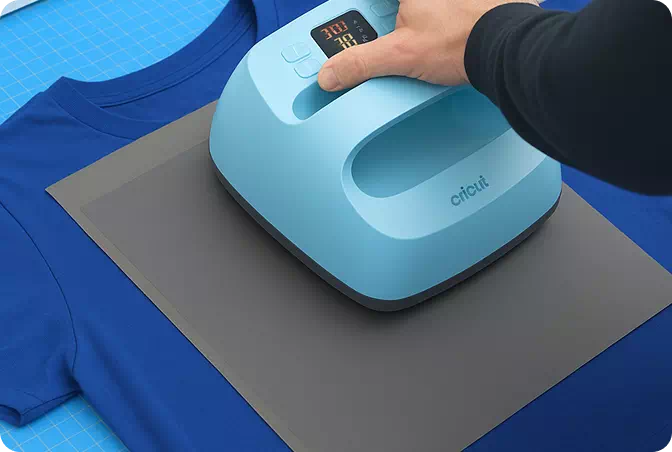
2. Press
Set your Cricut to 320°F-340°F and press for 20 seconds. If the transfer isn't adhering, increase the temperature by 15°F and retry. Don't worry you can't overpress.
Always place a Silicone Garment Protector over the design before pressing with firm pressure for 20 seconds.
Well-pressed transfers last longer through washes and wear.
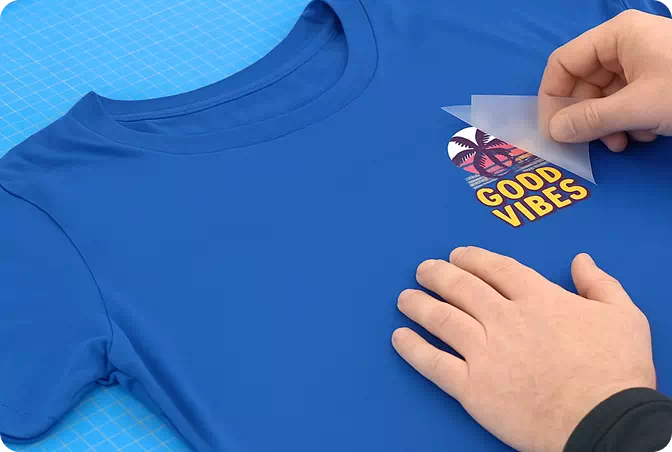
3. Peel Hot After a Few Seconds
You can peel either hot or cool just wait a few seconds before peeling. If any part of the design doesn't stick, lay the film back down and press again with increased pressure and heat (add 15°F).
If needed, continue adjusting the heat in 15°F increments until the transfer adheres fully. Don't worry repeated pressing won't damage the design
4. Final Press
Place parchment paper (included) or a single layer of t-shirt fabric over the design and press again at the same settings for 20 seconds. This helps soften the design, boost durability, and reduce shine.
For a glossier finish, use a Protective Guard Sheet instead.