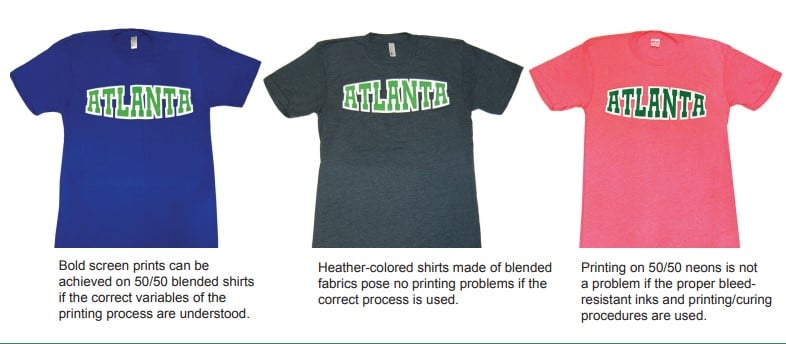
Perfecting Printing on Poly/Cotton T-Shirts
But apparel manufacturers have strived to bring excellent cotton/poly-blended fabrications to the marketplace that — when combined with specifi c instructions on how to print on blends — result in eyecatching graphics. As the drive for additional styles and fabrics have fl ooded our industry, the need to perfect the printing on 50/50 blends has become a necessity for every screen printer.
In this Tech Tips Newsletter, we will review the processes needed to print on 50/50 blends. For this demonstration, we will be using American Apparel’s style BB401, a poly/ cotton blend that is made from combed cotton that gives it an ultra-soft, worn-in feel and fashionable drape. The shirts are offered in solids, heathers and neons, which all are ideal for direct screen printing.
For the artwork, we chose a simple two-color design that is representative of many of the basic jobs screen printers are provided by clients to print on poly/cotton blends. This article includes tips for working with the fabric, as well as printing parameters designed to achieve the best print possible.
Two of the most important things to know when printing on poly/cotton blends are your ink and fabric performance characteristics. Pretesting for bleed resistance is key. To properly print on a 50/50 blend, you have to know that the ink you are using will meet the needs of the fabric.
Although 50/50 blends do not pose the potential threat that 100% polyester fabrics do, you still must ensure your ink will perform and last on your respective fabric. As there are a variety of bleed-resistant inks on the market,
you should pretest to ensure the ink is printer friendly with good printability, and also possesses the bleed resistance to block any potential dyes that could bleed over time.
One good test method is to print a 2-inch square image area that will be printed with the same bleedresistant ink and the same mesh counts that will be used in the production run. Once printed and properly cured, you should set the swatch aside for ageing. Should any color show through the ink film, you will know that you must change inks or your printing and curing processes. Although it’s not time-efficient, should a customer bring you a new fabric, you will still have a physical sample to monitor the ink and fabric’s performance.
Another primary key to printing on blends is to minimize the heat to which the ink and fabric are exposed. Although you need the ink to reach 320°F throughout the entire ink film, you must not allow the fabric to reach 360°F, as this is the point where many polyester dyes will sublime (convert from a solid to a gas and penetrate the ink). To avoid this, minimize your ink film thickness and back off on your flashing parameters. You only need to achieve a dry state on the ink film surface, rather than cure the ink
SCREEN TIPS
An important step in printing on blends is to minimize your mesh count. In this scenario, we will be printing an image using three screens.
- 156 mesh for the white underbase
- 230 mesh for the overprint color
- 156 mesh for the highlight white
This screen sequence will allow for a thin ink film requiring a minimal amount of heat in the flashing process. This also will ensure a proper cure as opposed to printing a thicker ink film.
It also is important to maximize your tension. High screen tension will only contribute to the overall quality of your print. It also will allow you to print with less squeegee pressure and deposit a thinner ink film onto the surface of the garment.
When printing with a low-tension screen, you will require a greater off-contact distance to achieve a proper offcontact and, thus, greater squeegee pressure. The result is pressing the ink into the fabric, which produces a thicker ink film (through required additional hits), greater flash times to properly flash the thicker ink film and additional dryer heat to ensure a proper cure.
Next, be sure to minimize the off-contact and squeegee pressure. One objective when printing on blends (or any fabric containing polyester) is to minimize the amount of fabric with which the ink comes in contact. This will, in turn, minimize the amount of ink that is into contact with the polyester fibers and, thus, minimize the potential for dye migration.
The greater the amount of plastisol that comes into contact with the fabric’s polyester fibers, the greater the potential for the polyester dyes to be dissolved and allowed to travel (migrate) through the ink film. For the printer, this is the primary reason for minimizing the ink film thickness and depositing that ink film onto the surface of the fabric, not driving it in.
PRINTING TECHNIQUES
For this printing procedure, we will use a 60/90/60 squeegee blade. The blade will allow for the soft 60-durometer edge to pass a sufficient ink film thickness through the mesh and onto the fabric surface, while the 90 durometer will deter the squeegee from rolling over, resulting in a smeared print.
It also is important to monitor your platen temperature. One aspect of the process that many printers fail to consider is the amount of heat the platens can absorb from the flashing process and the residual effect this will have on the printing process.
Remember that the hotter the ink film is when entering the dryer, the greater the potential for that print/fabric to exceed 360°F, thus resulting in dye sublimation. This aspect of the process dictates that you use a fastflashing white, which allows you to minimize your flashing temperatures and, in turn, decrease the flash setting as the platens heat up.
When it comes to curing parameters, there are three widely used methods for ensuring the correct cure of a finished print. The first is to use heat tape strips. These are adhesive strips that are divided into five sections that change from white to black when a certain temperature is reached. Although good as a guide, heat tapes are not a definite means of determining that the ink film is properly cured because they do not tell you the temperature of the ink within the ink film itself.
The second is the non-contact pyrometer that you simply point at the ink film and take a reading of its surface temperature. These units are sold by most graphic supply distributors and can cost less than $50. Here again, this is a good guide (once you have determined the correct cure settings for your dryer), although this does not ensure the degree of cure within the ink film itself
The third way to determine if your print is cured correctly is the on-contact ink probe, or “donut.”This digital probe has an attached donut with two crossing wires that are laid straight onto/into the ink film of a finished print.
The probe is then sent through the dryer, allowing you to monitor and document the actual temperature of the ink film. This allows you to see at what point in the dryer — and for how long — the ink film reaches 320°F. Although the most accurate, it is not the definitive answer regarding the proper cure of the finished ink film. The definitive test is the one the consumer will use: the wash test. Once washed, the print should show no sign of degrading, cracking or loss of opacity.
A WORD ABOUT NEONS
With the popularity of neon apparel making a resurgence, it is important to know that great designs can easily be achieved on these fashion-colored garments. Many printers make one of two mistakes when printing on neon-dyed fabrics. They either assume that fluorescent dyes do not migrate and print the 50/50 fabric with an ink intended for 100% cotton. Or, they overcompensate for the fluorescent dyes and print an excessively thick ink film onto the fabric, resulting in an insufficient cure and, thus, ending in dye migration.
Although the common logic is that 100% cotton shirts do not bleed, neon-dyed garments processed with a reactive dye can pass dyes into the ink film and result in migration. The simple fact is that you should print a 100% cotton or a 50/50 neon shirt in the same manner as any other 50/50 fabric. Remember to use the proper bleed-resistant inks and printing/curing procedures that will guarantee a bright and bleed-resistant print from production run to production run.
Printing on fabrics containing polyester can offer challenges on a number of different fronts. Once you have identified the variables within the process and understand the interactions between the inks and fabrics, you can develop the correct procedures to ensure a quality print for all the fabrics you have to embellish.
step-by-step
-
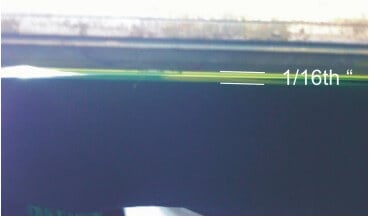 Step1 : This graphic shows the approximate 1/16-inch off contact gap between the print side of the screen and the garment surface.
 -
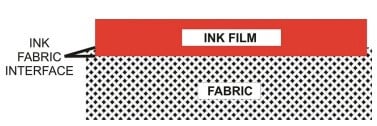 Step2: This shows the effect of minimizing the amount of fabric that the ink comes in contact with when the ink is not pressed into the fabric, thus minimizing the potential for dye migration and allowing for an easier cure.
 -
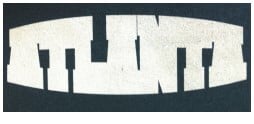 Step3: Here, the initial white underbase print is deposited onto the surface of the fabric.
 -
 Step4: The greatest advantage of the underbase procedure for the end user is a bright print with a soft hand on a dark garment.
 -
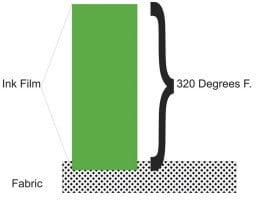 Step5: Always remember that the entire ink film thickness must reach the cure point, not just the ink surface.
 -
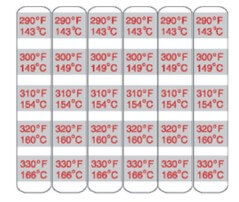 Step6: Heat tapes can be used to determine an estimated point at which the shirts are properly cured.
 -
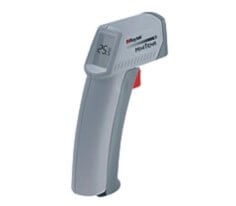 Step7: A second method for ensuring a print is correctly cured is using a non-contact pyrometer. You simply point it at the ink film and take a reading of the ink film’s surface.
 -
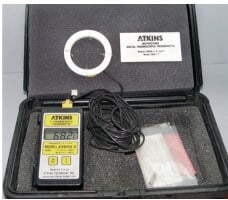 Step8: The donut probe allows you to acquire a reading on the surface of the fabric within a (test) print.
